 Login
Login


Recipe: Green Banana Miso
Did you know you can use green bananas to make your own miso? All you need is the right equipment and a little patience. Recipe by Edible Alchemy.
Miso is a fermented paste usually made from soybeans or other legumes, salt and koji (a mold-fermented rice or barley). In this recipe, we replace the starchy carbohydrates of beans and legumes with green bananas which are rich in starch and high in fiber - similar to soy beans but with a fruity aroma.
Before your start with the preparation, you can choose whether you want to make a younger or older miso. Fermentation times range from one month to several years, which affects the flavour significantly. Younger misos are sweeter, have a creamy, nutty flavour and are best suited to dressings and miso soup. Older misos are saltier in taste and much richer. These ones are darker in colour and pair well with more robust flavours such as beet root or stews in general.
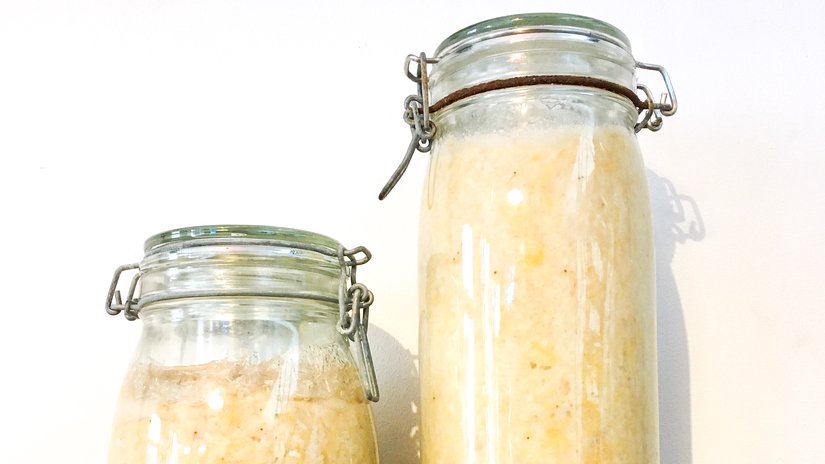
Ingredients (for a 1000 ml jar of miso)
- 450 g green banana mash (aprox. 600 g green bananas with peel on)
- 500 g rice koji (bought or from scratch)
- Salt
Preparation
- Make a small slice in the green bananas skins down the spine just to cut the skin and not the banana itself.
- Put sliced green bananas with skins on in boiling water for 15 mins.
- Allow bananas to cool down, remove the skins and mash the bananas.
- In a large bowl, mix together the green banana mash with 500 g koji and salt. For a sweet young miso (waiting time before using: 3 months) use 6% = 25 g salt, for a older mature miso (waiting time up to a year or longer) use 15 % = 60 g salt.
- Mix until you have a well mixed mash that holds together well when making a ball.
- Form the banana-koji-salt mash into palm held balls and throw each ball down into the 1000 ml vessel. Throwing them down help get rid of any hidden air pockets, as we want this to be an anaerobic (i.e. no air) ferment. After each ball is thrown down, you can press the layer down to ensure this “airlessness”.
- Once all the miso mash is filled into the jar, sprinkle 2 Tbs. salt to cover the surface to keep away any unwanted yeasts or bacteria during the long fermentation process. Wipe off any miso mash from the vessel walls to keep flavours clean.
- Add a layer of baking paper or plastic wrap on top of this with a jar or weight to keep everything covered.
- The jar does not need to be air tight but some kind of covering on top. During this enzymatic breakdown, there may be gases released which should be able to escape the vessel in order to not have an alcoholic result.
- After a month, check up on the miso. It may have already started to change to a darker colour. If needed, press air bubbles down and allow it to continue to ripen.
- Store the container in a dark and cool place for at least 3 months/ 1 year, depending on your salt concentration (see above)! Write the date. It gets more valuable and rich in taste over time. If you are not in a hurry, you can carry on fermenting as long as you'd like – the best misos are left to age for years


